Reliable provider offering 24/7 plumbing & HVAC services

To winterize plumbing in Grande Prairie, map cold zones and vulnerable pipes, especially garages, crawl spaces, and exterior walls. Insulate exposed runs with foam sleeves, add heat tape on risky lines, and cover outdoor faucets. Shut off and drain exterior taps and sprinklers, disconnect hoses, and store them indoors.
During deep freezes, keep indoor temps above 15°C, open sink cabinets, and seal gaps around pipe penetrations. If you’re unsure, schedule a fall inspection and use safe thawing methods—here’s how.
Even before the first deep freeze hits Grande Prairie, start by mapping where your pipes are most likely to freeze and why. Note unheated crawl spaces and basements first, since they can run 10–15°F colder than living areas. Flag garage lines, which freeze about three times more often than interior runs. Walk north-facing walls that see more freeze events, and mark kitchen and bathroom pipes on exterior walls—these drive most damage claims, especially when within six inches of the outside.
Install wireless thermometers in these zones and set alerts at 4°C. Expect cold zones after 6+ hours below -18°C, and remember basements cool 2–3°C per hour during outages. Log pipe materials and ages; prioritize older copper, brittle PVC, corroded galvanized, weak fittings, and drafty penetrations near windows, outlets, and rim joists.
Start with the pipes you can see and touch: exposed runs in basements, crawl spaces, garages, attics, and along exterior walls, plus every outdoor spigot. Measure each run, then cut foam pipe sleeves to fit. Choose insulation thickness for your pipe diameter and expected cold, and press adhesive seams tight or secure with fasteners so the foam fully surrounds the pipe.
For high‑risk exterior wall runs, add heat tape first per the manufacturer’s instructions, then cover with foam. In cabinets on exterior walls, open doors to let warm air reach the pipes. Protect outdoor spigots with fitted foam covers that cinch snugly to the wall, and wrap any exposed fixtures.
Measure exposed runs, add heat tape where needed, seal foam snugly, and protect outdoor spigots.
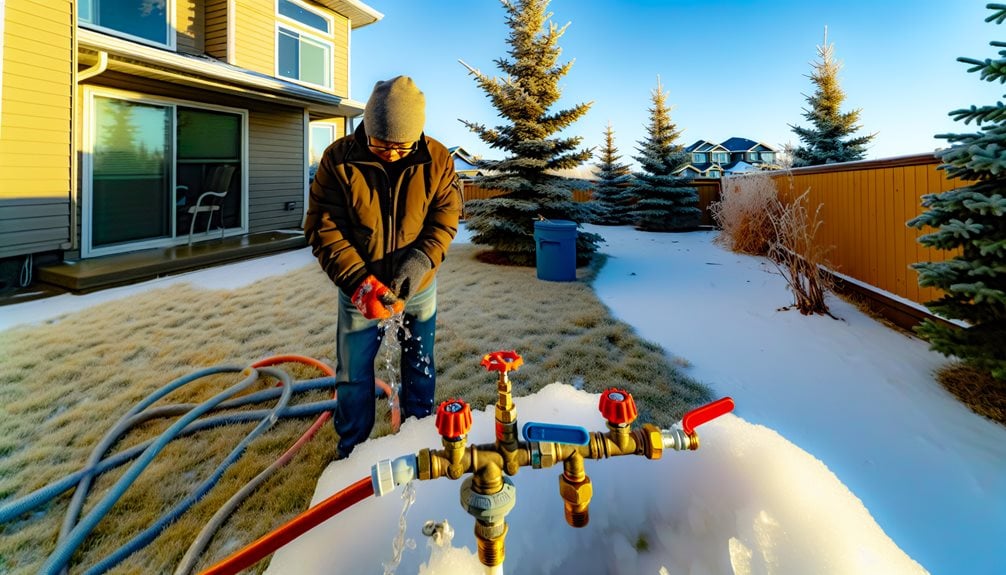
Start by shutting off your exterior water valves inside the house, then open each outdoor tap to drain the lines completely. Disconnect every garden hose from the spigots, shake out residual water, and store the hoses indoors to prevent trapped water from freezing.
If you have sprinklers, use the system’s drain method or a professional blow-out prior to the winter season to clear all zones so no water remains to crack pipes or fittings. Scheduling a professional inspection in early fall helps catch vulnerabilities like exposed pipes or outdoor fixtures before freezing weather arrives.
Protect your outdoor plumbing by disconnecting and storing every hose before hard frosts set in. Start by removing garden hoses from all outdoor faucets, then detach spray nozzles, timers, and sprinkler connections.
Separate any linked hose lengths at the couplings; use pliers if fittings are stuck. Drain each hose completely: lift one end higher, drape it over a railing, and walk the length, pushing water toward the low end. Repeat until no water emerges, and if a hose must thaw indoors, connect the ends together to prevent drips. For added protection, place brass caps on hose ends before storage to keep out residual moisture and debris.
Store hoses and accessories in a temperature-controlled space. Avoid leaving any water inside.
Once hoses are stored, shut off every exterior water line at its interior shutoff valve, then drain the lines so nothing can freeze. Find valves along basement or utility room walls where outdoor lines enter. Many homes have a dedicated valve for each spigot; labels help.
Turn the valve clockwise until you feel firm resistance. Test each valve early in fall so you’re not troubleshooting in a cold snap. After closing, inspect the stem and packing for leaks. Use foam faucet covers to insulate outdoor faucets before sustained freezing temperatures arrive.
Open each exterior faucet to release trapped water, and let it drain for several minutes. Confirm there’s no continued flow, which can indicate a missed or faulty valve. Leave exterior faucets open through winter.
With exterior spigots secured, turn your attention to the irrigation system so trapped water doesn’t crack pipes, heads, or the backflow preventer. Shut off the irrigation supply, then open manual drain valves at low points and zones to release water.
If your system auto-drains, cycle zones to drop pressure. For a complete purge, use an air compressor: connect downstream of the backflow, never through it, and keep pressure at or below 60 PSI. Blow out each zone until only mist appears, then stop. This protects your system because freezing water expands, which can crack pipes and damage components.
Aim to winterize at least a week before the first hard freeze.
Start by shutting off the main water valve where the supply enters your home, then open every faucet and low-point drain to empty the lines completely. As water stops flowing, flush toilets, drain the water heater per manufacturer guidance, and leave faucets slightly open to release any remaining pressure.
Next, protect cold-exposed pipes with foam sleeves or UL-listed heat tape—especially along exterior walls, in garages, and crawl spaces—ensuring there are no gaps where cold air can reach bare pipe. This helps prevent freeze damage and can also lower energy bills by reducing the workload on heating systems.
Two priorities matter when preparing for deep cold in Grande Prairie: knowing exactly where your main shut-off valve is and understanding when to close it. Find the valve now, not during a crisis. It’s usually 10–15 feet from where water enters, often near the water heater, under the kitchen sink, or in a utility room, and it may be labeled. Make sure everyone in your household can point to it. Regularly check the valve for proper function before winter to ensure it operates smoothly in an emergency.
Shut the main when forecasts dip into the teens, during extended absences, or for winterizing a vacant home. Keep the thermostat at 55°F or higher if you’ll remain in residence.
One essential step after closing the main valve is draining every faucet and line so trapped water can’t freeze, expand, and burst pipes. Start by opening all faucets throughout the home, including sinks, tubs, and showers. Turn on both hot and cold handles at each fixture, and leave them open all winter to relieve pressure.
Flush toilets, then remove remaining water from the tank and bowl to prevent cracking. Set your home’s temperature to at least 15 degrees Celsius when you’re away to help prevent frozen pipes. Shut off the water heater’s supply and drain it completely if you’ll be away for an extended period.
Next, find interior shut-off valves for outdoor faucets. Close those valves, then open the exterior spigots to empty the connecting lines, and keep them open. Confirm no water continues flowing. For long absences, consider professional full-system drainage.
Even after you’ve drained lines, cold snaps in Grande Prairie can still threaten any pipe that’s exposed to drafts or unheated spaces. Start by insulating every unprotected run, especially in attics, crawlspaces, garages, and along exterior walls. Slide foam sleeves over pipes, butt joints tightly, then secure seams with strong tape.

Add heat tape or electric pipe wrap on the coldest sections, following manufacturer instructions. Improve air circulation by opening vanity and kitchen cabinets, and keep interior doors ajar. Maintain indoor heat—set thermostats to at least 18°C when home, 15°C if you’re away—and use smart monitors for alerts.
When deep freezes hit, let exposed faucets drip to keep water moving and reduce pressure. For extra protection, locate your main shutoff valve so you can quickly cut water in an emergency to prevent damage.
You’ve got a solid toolkit for cold snaps, but knowing which tasks you can handle and which need a pro will save time, money, and stress. Do the simple work yourself: wrap exposed pipes with foam sleeves, install foam covers on outdoor spigots, and open kitchen cabinets on frigid nights. Ensure attic insulation is in good condition and correctly installed to maintain adequate heating and protect vulnerable piping.
Call a professional for whole-home inspections, water heater or boiler maintenance, and any system you’re unsure about. Pros use diagnostic tools, safely flush tanks, and can drain vacant homes, including blowing out lines with compressors. For frozen pipes, use safe heat sources; never use a torch unless you’re trained and equipped.
Before Grande Prairie’s deep cold sets in, map out your winterization by the calendar and by priority. In early fall, schedule a professional plumbing inspection or follow our winter tips to catch vulnerabilities before freezes. Ask for a thorough check of water heaters, exposed pipes, outdoor spigots, septic systems, and heating equipment. Have the water heater flushed, the temperature and pressure relief valve inspected, and boiler radiators bled, then check for leaks.
Next, handle outdoor lines before the first freeze. Disconnect and drain garden hoses, shut off and drain exterior faucet lines, and add insulated covers. Drain sprinklers and irrigation lines, or bring in a pro. Installing a frost-free hose bib now is a smart upgrade that helps prevent pipe bursts and reduces winter maintenance.
Indoors, insulate pipes in unheated spaces and along exterior walls, seal gaps with caulk or foam, and close foundation vents. Add water-heater insulation as needed.